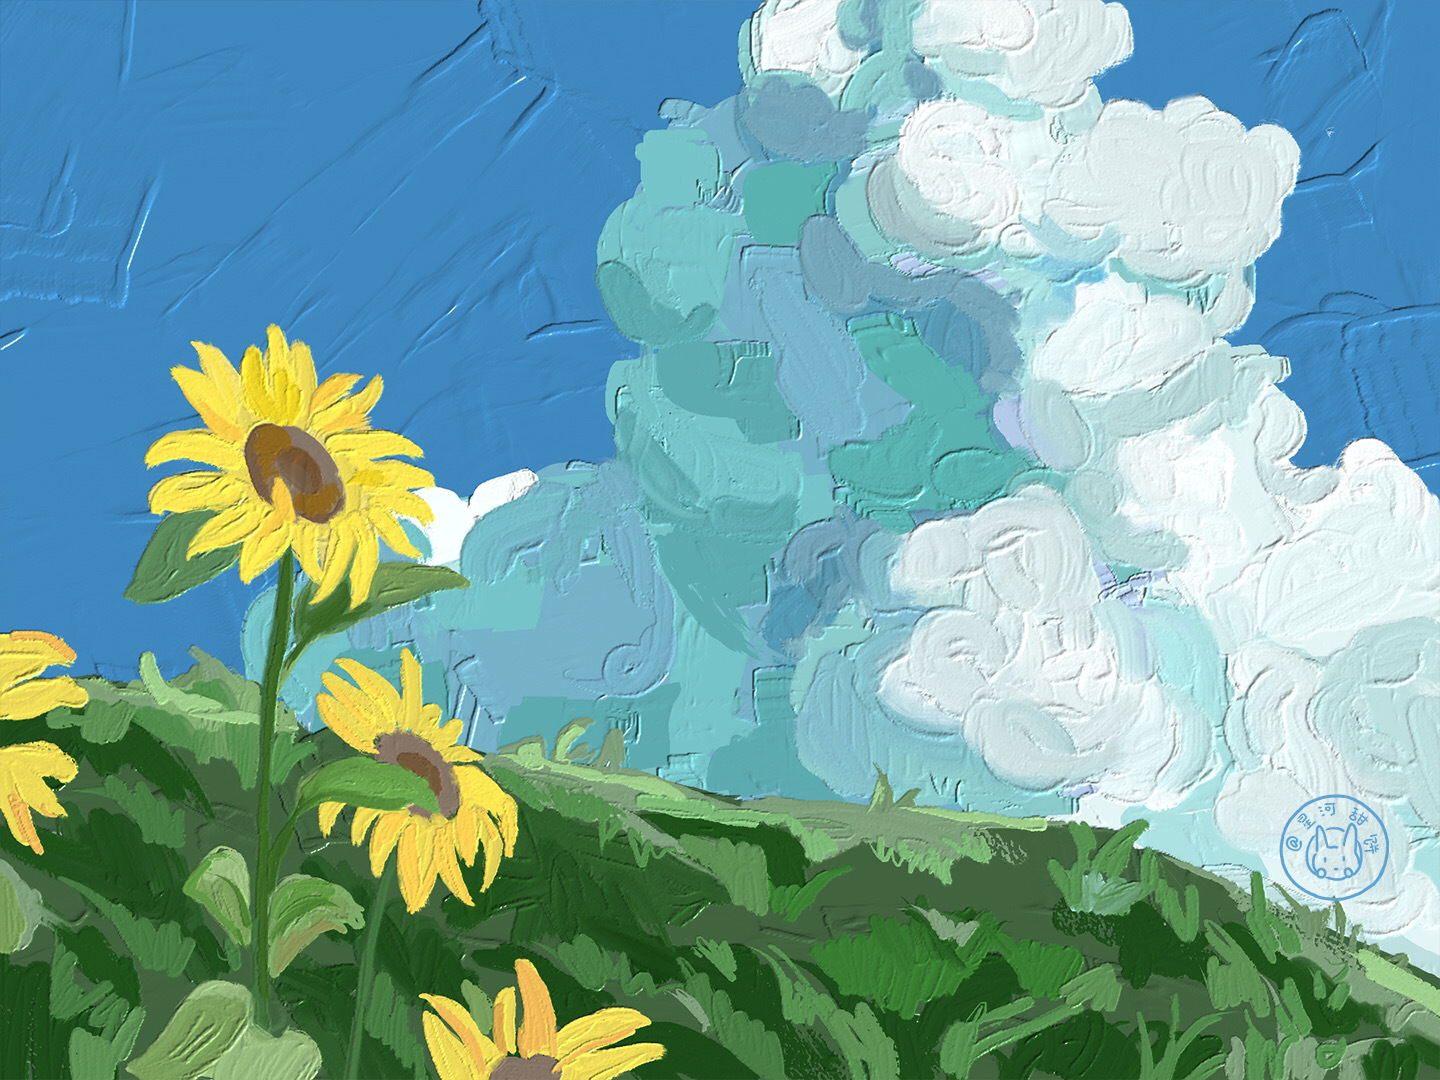
UE 油画滤镜
导读:前言.非真实感渲染的风格不经相同,其中一种便是油画风格,本文总结了如何实现油画滤镜的方法.Kuwahara Filter.为什么使用Kuwahara Filter?.一般对图像进行模糊处理,会使用低通滤波器,但往往模糊后图像会失去它们的硬边,但Kuwahara Filter可以在
前言
- 非真实感渲染的风格不经相同,其中一种便是油画风格,本文总结了如何实现油画滤镜的方法
Kuwahara Filter
- 为什么使用Kuwahara Filter?
一般对图像进行模糊处理,会使用低通滤波器,但往往模糊后图像会失去它们的硬边,但Kuwahara Filter可以在平滑图像的同时也能保留其硬边


如何实现Kuwahara Filter?
Kuwahara Filter也是使用卷积,但不同之处是Kuwahara Filter需要四个卷积核
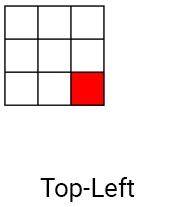
过程:计算每个卷积核的平均值(平滑噪点)和方差(衡量一个内核的颜色变化率),一共四个。找出方差最小的卷积核并输出其平均值
例子
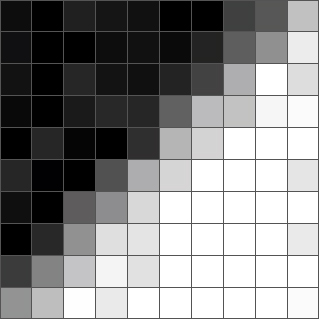
对于上图的计算动图如下
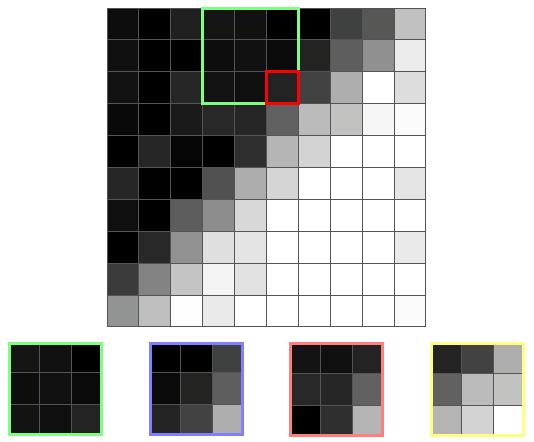
右边的颜色变化率太大了,不会选它,这里选择的是最左边的卷积核,因为它的颜色最均匀,最后输出它的平均值
实现油画滤镜
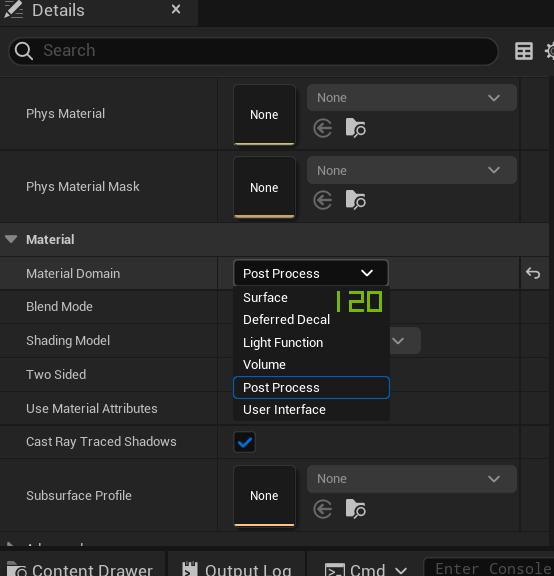
根节点需要选择”Material Domain”为”Post Process”
总体实现框架
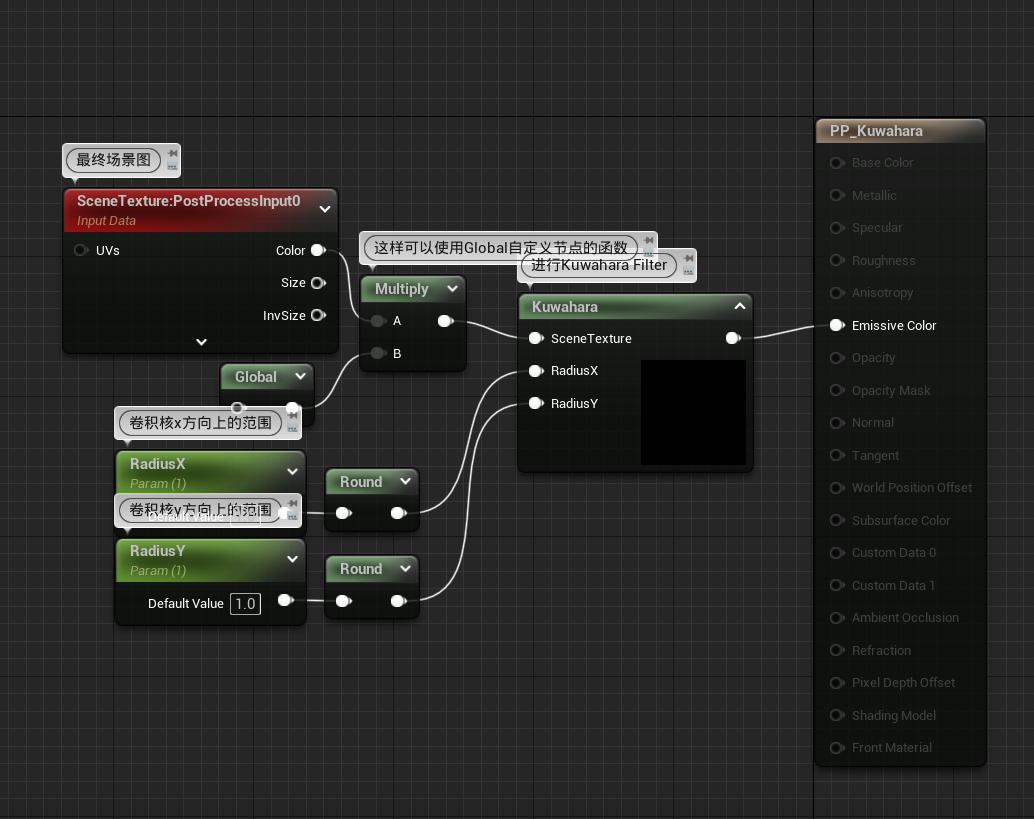
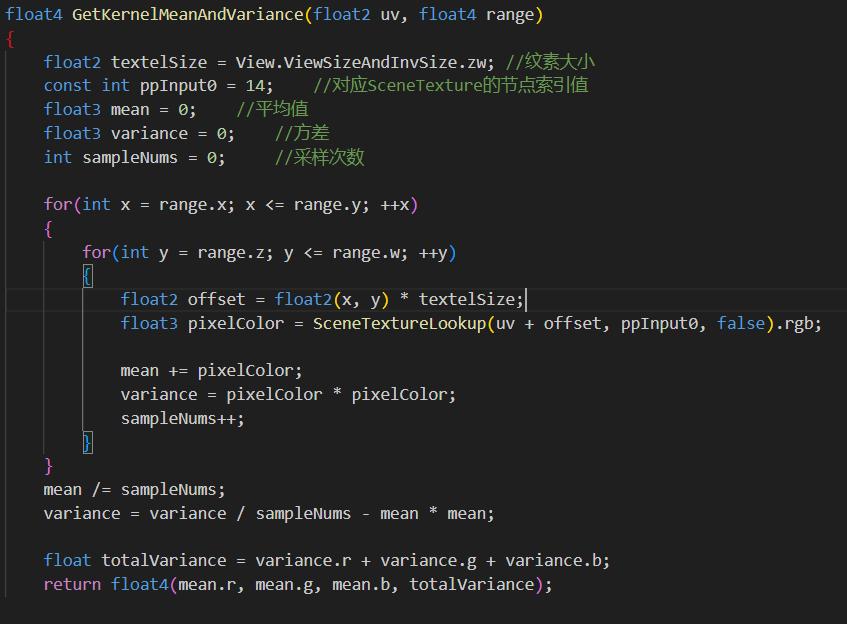
“Global”自定义节点计算平均值和方差
方差计算公式
    int32 SceneTextureLookup
(
    int32 ViewportUV,		// 纹理坐标
    uint32 SceneTextureId,	// 节点sceneTexture中的Scene Texture Id索引值
    bool bFiltered	//是否使用双线性插值
)
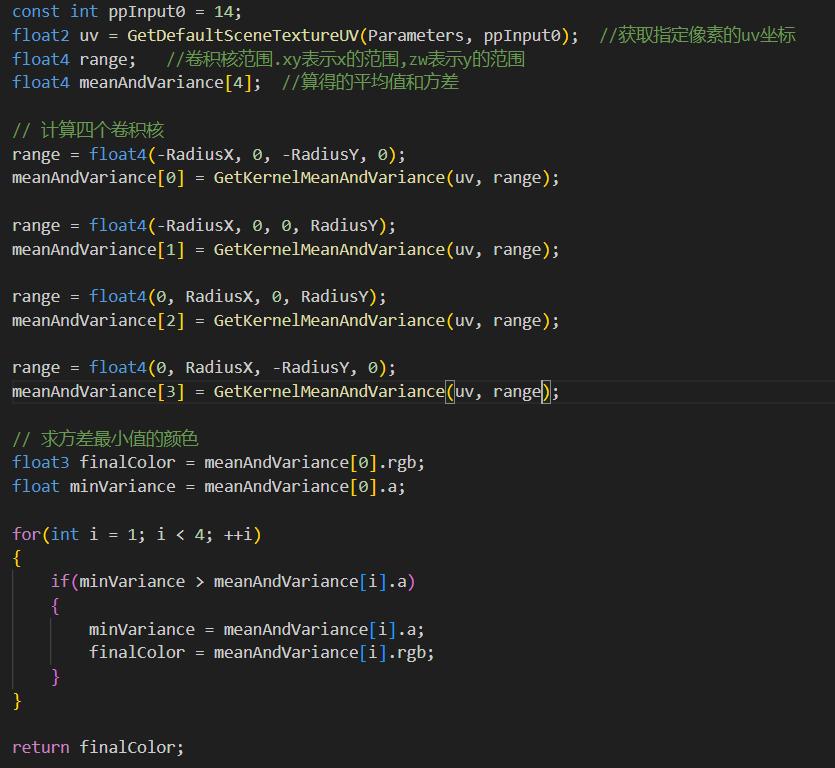
计算四个卷积核
效果对比
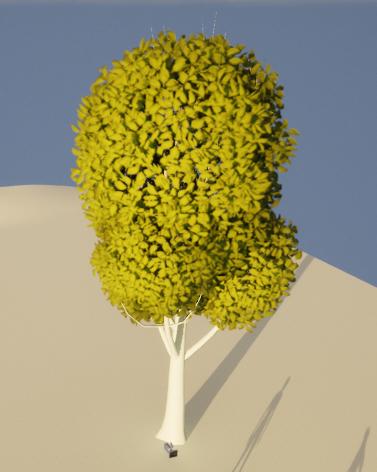
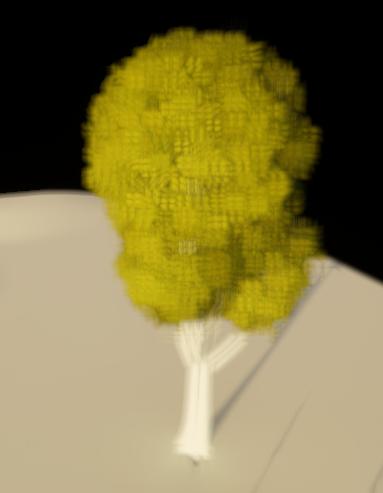
实现方向性油画滤镜
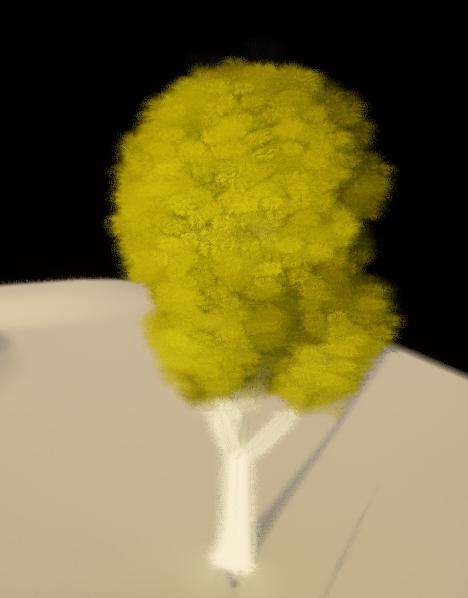
为什么需要方向性油画滤镜
从上图可以看出该滤镜某些地方有点奇怪,过于方正,而方向性油画滤镜可以解决这个问题如何实现
方向性油画滤镜和之前的差别在于它的卷积核和像素的局部朝向相同
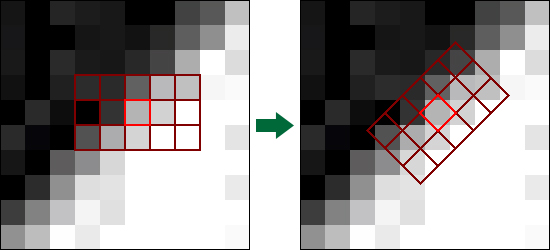
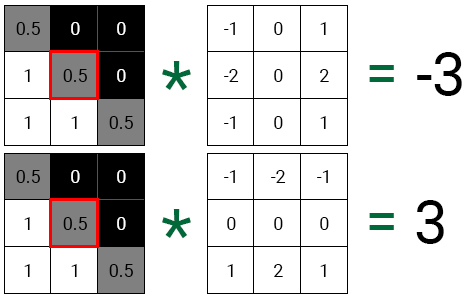
计算局部朝向的方法是Sobel
Sobel需要两个卷积核,Gx提供水平方向的梯度信息,Gy提供垂直方向的梯度信息。使用这两个卷积核分别对像素做一次卷积,再使用atan()求角度,随后以该角度对卷积核进行旋转

* 例子
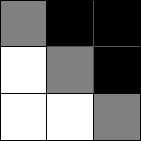
对上图进行Sobel,得到的结果如下
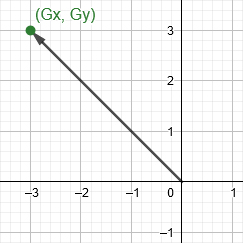
使用atan()求角度
具体实现
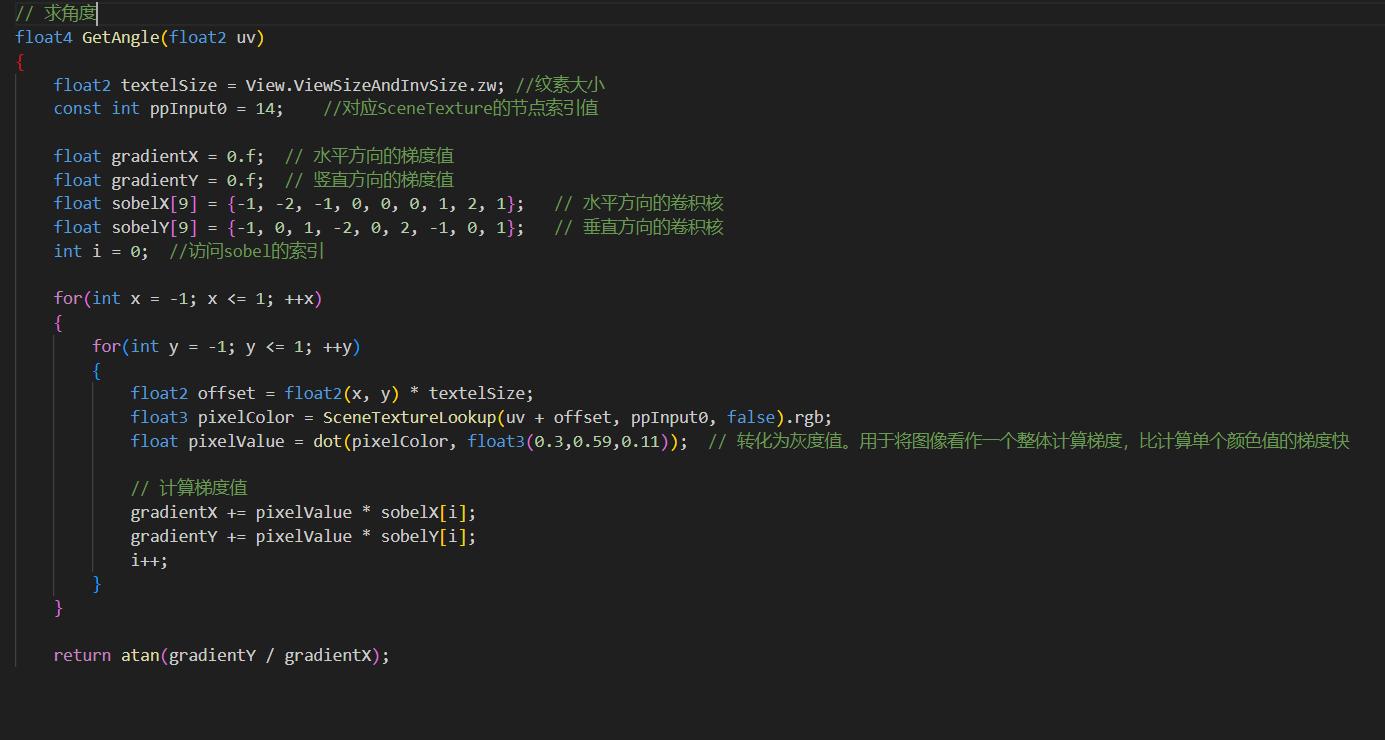
求角度
修改GetKernelMeanAndVariance()
float4 GetKernelMeanAndVariance(float2 uv, float4 range, float2x2 rotationMatrix){ //… float2 offset = mul(float2(x, y) * textelSize, rotationMatrix);
计算旋转矩阵

效果对比
源代码
global
float4 GetKernelMeanAndVariance(float2 uv, float4 range, float2x2 rotationMatrix){ float2 textelSize = View.ViewSizeAndInvSize.zw; //纹素大小 const int ppInput0 = 14; //对应SceneTexture的节点索引值 float3 mean = 0; //平均值 float3 variance = 0; //方差 int sampleNums = 0; //采样次数
for(int x = range.x; x <= range.y; ++x)
{
    for(int y = range.z; y <= range.w; ++y)
    {
        float2 offset = mul(float2(x, y) * textelSize, rotationMatrix);
        float3 pixelColor = SceneTextureLookup(uv + offset, ppInput0, false).rgb;


        mean += pixelColor;
        variance = pixelColor * pixelColor;
        sampleNums++;
    }
}
mean /= sampleNums;
variance = variance / sampleNums - mean * mean;


float totalVariance = variance.r + variance.g + variance.b;
return float4(mean.r, mean.g, mean.b, totalVariance);
}
// 求角度 float4 GetAngle(float2 uv) { float2 textelSize = View.ViewSizeAndInvSize.zw; //纹素大小 const int ppInput0 = 14; //对应SceneTexture的节点索引值
float gradientX = 0.f;  // 水平方向的梯度值
float gradientY = 0.f;  // 竖直方向的梯度值
float sobelX[9] = {-1, -2, -1, 0, 0, 0, 1, 2, 1};   // 水平方向的卷积核
float sobelY[9] = {-1, 0, 1, -2, 0, 2, -1, 0, 1};   // 垂直方向的卷积核
int i = 0;  //访问sobel的索引


for(int x = -1; x <= 1; ++x)
{
    for(int y = -1; y <= 1; ++y)
    {
        float2 offset = float2(x, y) * textelSize;
        float3 pixelColor = SceneTextureLookup(uv + offset, ppInput0, false).rgb;
        float pixelValue = dot(pixelColor, float3(0.3,0.59,0.11));  // 转化为灰度值。用于将图像看作一个整体来计算梯度,比计算单个颜色值的梯度快


        // 计算梯度值
        gradientX += pixelValue * sobelX[i];
        gradientY += pixelValue * sobelY[i];
        i++;
    }
}


return atan(gradientY / gradientX);
Kuwahara
const int ppInput0 = 14;float2 uv = GetDefaultSceneTextureUV(Parameters, ppInput0); //目标像素点 float4 range; //卷积核范围.xy表示x的范围,zw表示y的范围 float4 meanAndVariance[4]; //算得的平均值和方差
float angle = GetAngle(uv); float2x2 rotationMatrix = float2x2(cos(angle), -sin(angle), sin(angle), cos(angle));
// 计算四个卷积核 range = float4(-RadiusX, 0, -RadiusY, 0); meanAndVariance[0] = GetKernelMeanAndVariance(uv, range, rotationMatrix);
range = float4(-RadiusX, 0, 0, RadiusY); meanAndVariance[1] = GetKernelMeanAndVariance(uv, range, rotationMatrix);
range = float4(0, RadiusX, 0, RadiusY); meanAndVariance[2] = GetKernelMeanAndVariance(uv, range, rotationMatrix);
range = float4(0, RadiusX, -RadiusY, 0); meanAndVariance[3] = GetKernelMeanAndVariance(uv, range, rotationMatrix);
// 求方差最小值的颜色 float3 finalColor = meanAndVariance[0].rgb; float minVariance = meanAndVariance[0].a;
for(int i = 1; i < 4; ++i) { if(minVariance > meanAndVariance[i].a) { minVariance = meanAndVariance[i].a; finalColor = meanAndVariance[i].rgb; } }
return finalColor;
reference
UE4卡通渲染基础教程 Part4:Paint Filter - 知乎 (zhihu.com)
Unreal Engine 4 Paint Filter Tutorial | Kodeco
上一篇:Unity学习笔记--基础
下一篇:数据分析框架1.0 从黄金思维圈